
PM – Quick Start Guide for Rent Payments
This guide is being created to get you up and running as fast as possible. By the end, you will have created an account for your business, added team members, applied to accept pre-authorized debit payments for you and your property owners, and finally set up the rent payment for a single property.
Step 1: Creating an Account
Start by going to the registration page, located here. Enter in an email address and password and click the Next button. Then, make sure to choose the Property Manager option at the top, and enter the remaining details.
A confirmation email will be sent to your email address.
Once you have confirmed your email address, you will be able to log into the system.
After email confirmation, you will receive an onboarding email with some quick links, as well as the contact information for your designated customer success team member at StreamlineLS. They will be your go-to person for ensuring that you get the most out of our platform.
Step 2: Add Team Members
As a property manager, you likely have a support staff who will also need access to your account on our platform. Each team member can be added as a separate user, with their own credentials. When they log into the platform, they will still be using your main account but just accessing it under their credentials.
To create a Team Member, navigate to People / Team Members on the left navigation.
Click on Add Team Member and fill in their name and email address and click Save.
They will be sent a confirmation email. When they confirm their email address, they will be prompted to set a password. Now, they are able to log into the platform under their own credentials.
A team member can perform all the same functions as the main account, but they cannot create other team members.
Repeat this process for each staff member that you would like to have access to your account.
Step 3: Add a Property Owner
In this step, we are going to add a Property Owner. This is the user who will own one or more of the properties that you manage.
Start by navigating to People / Owners on the left navigation.
Click on the Add Owner button. Fill in their details. It is recommended that you choose the option to create an account for this user. If you do, they will be sent a confirmation email. Owners can log into the platform and see upcoming and past transactions to bank accounts that they control.
Please note that at this time, an owner must be an individual and have a first/last name and email address. If a property is owned by a corporation with more than one owner, they can still receive rent payments, but for now it is only possible to have one owner account for a property on the system. This will be changing in the near future.
Step 4: Register for PAD
In order to be able to set up rent payments to be processed through our system, you’ll need to register for pre-authorized debit (PAD).
Start by clicking on the Pre-Authorized Debit / Register for PAD menu item on the left navigation.
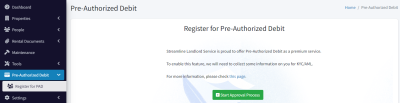
Then click Start Approval Process.
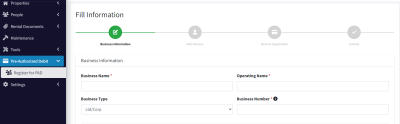
At this point, you’ll be prompted to enter in some information about your company. You’ll need the business name, operating name, and business number from the CRA.
The receiving bank account information will be the details for a bank account owned by your company. We can set up other bank accounts, as well as accounts for property owners later.
Below is the address information for your business.
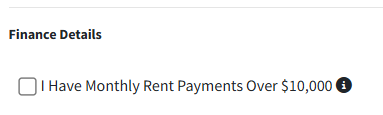
Then, we have a simple checkbox that must be checked if any of the expected rent payments are greater than $10,000. Please note that this is referring to any individual payments, and not the total rent roll.
Lastly, you have the option to be billed directly for any NSF fees that occur, or you can choose to have us bill the property owners directly. The benefit of you paying them is that you may add a markup if you wish. Current NSF pricing can be found here.
Click on Next Step.
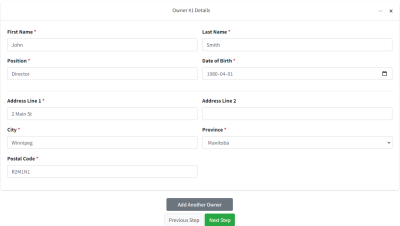
Next, we need the information about all owners of the company. This consists of first/last name, position in the company, date of birth, and address.
If there is more than one owner of your business, click the Add Another Owner button.
On the last page, you’ll see a summary of all the information you have entered. If anything doesn’t look right, use the Previous Step button to go back and make corrections.
Select that you agree to the terms and conditions, then click Confirm & Submit.

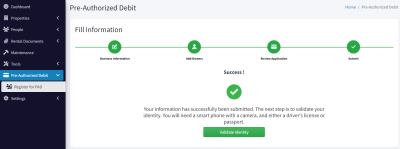
The next step is to validate your identity. This means providing some ID, and possibly documentation proving that you own the business. This is all part of our due diligence process.
Click on the Validate Identity button.
You will be prompted to enter your phone number. An SMS message will be sent to you and will contain some further instructions. You’ll need some photo ID like a driver’s license or passport to complete this process.
You’ll need to submit a picture of your ID, plus a selfie.
At this time, our team will review your application and will reach out if we need any additional information.
You will be notified by email when your application has been approved. In Canada, this is generally less than 1 business day.
Step 5: Add a Property, Tenant, and Rental Agreement
While we’re waiting to be approved for PAD, we can continue on.
Adding a Property
Navigate to Properties / Manage on the left navigation.
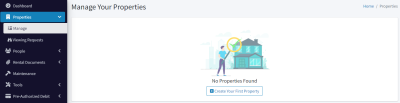
Click on Create Your First Property
Add the details of your first property.
- If this is a single-family home in a detached property, choose Single Family Home for unit type and add the street address below.
- If this is a property with two or more units that you manage, choose Multi-Unit from the Unit Type. Then we’ll need to enter in the individual units in a comma separated list.
- If this is a single condo in a condo building, choose single-family for the Unit Type, but then make sure to add address lines one and two in the address fields.
If you created the property owner who owns this building in step 3, you may select them from the Owner drop down list.
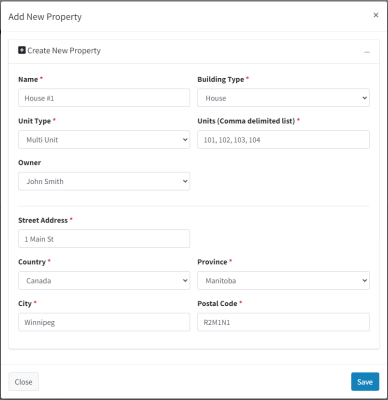
Click Save.
Adding a Tenant
On the left navigation, select the People / Tenants option.
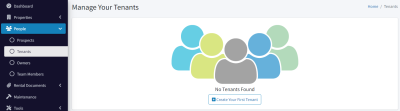
Click Create Your First Tenant
Fill in their first/last name, and email address. Optionally, choose to create an account for them (recommended). They will be sent a confirmation email if you chose to do this.
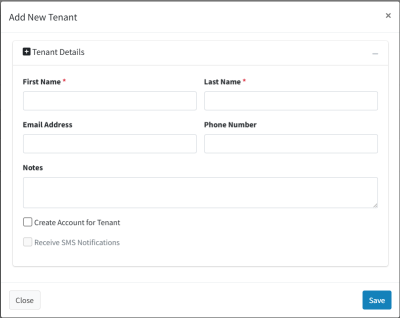
Click on the Save button.
Adding a Rental Agreement
The rental agreement represents the lease of a particular unit to one or more tenants, over a period of time. Documents may be uploaded to the rental agreement, such as lease files, PAD approvals, etc.
Start by clicking on Rental Documents / Rental Agreements on the left navigation.
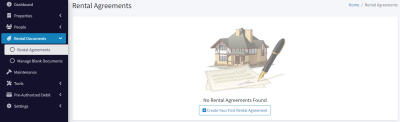
Click the Create Your First Rental Agreement button.
Choose the Property and Property Unit (if applicable). Then select one or more tenants and enter the monthly rent.
Finally, choose the rental term type (fixed term or month-to-month) and the start and end date (optional for month-to-month).
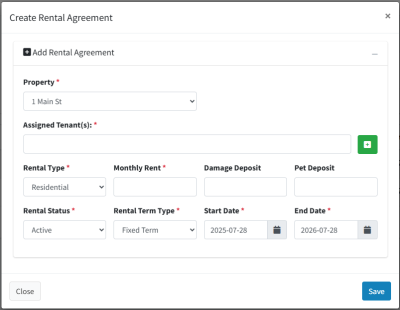
Click on the Save button.
Step 6: Registering a Property Owner for PAD
This step is optional and will need to be done, depending on how you have structured things in your business. Typically, there are two ways of doing things:
- Rent from tenants is collected in a bank account (regular or trust account) that you control. Then, you take care of any expenses and then send a payment to the property owner. This is the most common way of doing things and if this applies to you, you may skip this step and move on to step 7.
- Rent from tenants goes directly to the property owners bank account. You then invoice them for any expenses and your management fee. If this applies to you, then please do this step.
Approving an Owner for PAD
Your account must be approved for PAD before proceeding.
Navigate to the People / Owners page on the left navigation.
For the owner that you want to approve for PAD, click the Action button, then select Setup PAD.
When you registered your account for PAD in Step #2, you had the option to accept NSF charges yourself or pass them directly on to the property owner. If you chose to accept them yourself, you will have the option to fill in the owner’s PAD information yourself and submit it on their behalf. If you chose to pass the fees on to the owner, then the owner must fill in their own PAD application form.
Depending on which of these two choices you made, you can either fill in the same PAD information or an email link will be sent to the property owner for them to fill in.
Again, the process takes up to one business day, and we will reach out to you or the owner if we require any additional documentation. You will receive an email when everything is approved and ready to go.
Step 7: Setting up Monthly Rent Payments
Once the property owner has been approved for PAD, we can now configure the rent payment for the property and tenant we added earlier.
On the left navigation, go to Pre-Authorized Debit / Tenant Payments.
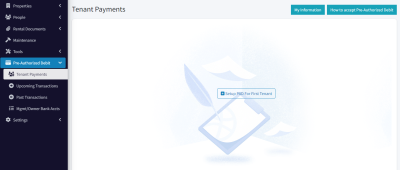
Click on Setup PAD for First Tenant
During this step, we are going to set up the tenant to make payments through our system. Select the desired tenant from the drop-down list.

You’ll notice that you now have 3 options.
- If you haven’t yet gotten documented permission for PAD payments from your tenant, you can do that though our system. Choose the top option and click the Send button. An email will be sent to the tenant which asks permission to withdraw rent payments, and they also fill in their banking information during this process.
- If you already have documentation that you have permission to withdraw PAD payments, choose the third option. At this point you can simply enter their banking information here. You’ll need to upload a PDF file which shows that you have permission to withdraw funds from their account.
- The middle option will email the tenant a standard PDF for giving PAD permission, and you can store that in the platform if you wish. This is just an easy way to get them the document to fill out if you prefer to have hard copies.
Regardless of which of the above options you choose, the tenant will now have given their permission for PAD and is set up to have payments withdrawn through our system.
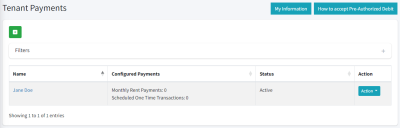
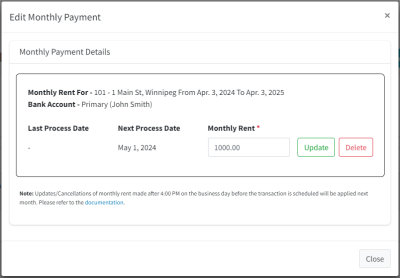
Click the Action button and select Monthly Rent.
Select the Rental Agreement, then check the amount, select the desired receiving bank account, and confirm the start date. Then click Create Monthly Payment.
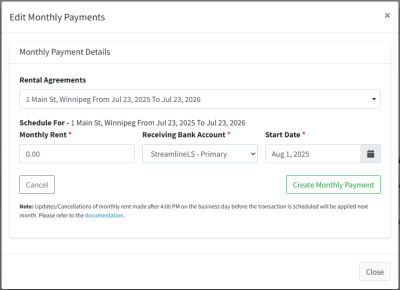
At this point, the monthly rent is now set up. If you need to update the amount, you would do it here, in this dialog. This is also where you can cancel the monthly rent when the tenant moves out.
To view upcoming transactions, navigate to Pre-Authorized Debit / Upcoming Transactions in the left navigation.
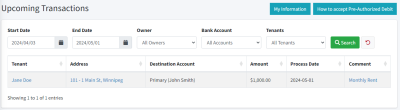
Here you can see all transactions scheduled. Change the end date to a few months into the future to see the rent being scheduled once per month.
If you need to schedule a one-time transaction (perhaps for a damage deposit or something else), on the Tenant Payments page, under the Action button, choose One Time Transactions. This page will allow you to schedule a single transaction.
Conclusion
In this document, we covered the following:
- Creating an Account
- Creating Team Members
- Creating Property Owners
- Registering for PAD
- Creating Properties, Tenants, and Rental Agreements
- Registering a Property Owner for PAD
- Configuring your first monthly rent payments and any one-time transactions
The next steps are to onboard your remaining property owners and add all of the properties and tenants to go along with that.
To assist you with that, and to take as much work off of your plate as possible, we have designated a customer success team member to your account. Their name and email are referenced in the onboarding email that you would have received.
We will work with you to get your data imported into our system.
It’s important to go through the process of adding the first entry by hand, but for everything else, allowing our team to help onboard you is easiest and fastest way to get going.
Please reach out to your customer success team member to initiate this process. Or, you may add everything manually if you’d like.
Further reading on the other functions of the system can be found on our documentation page, here.
Thank you,
The Streamline Landlord Service Team